Theme Installation
Here is a guide how to install a WordPress theme from the WordPress Admin Panel.
Step 1. Save theme zip file on your computer
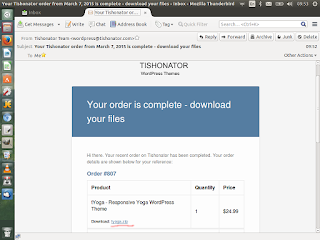
After choosing a theme and placing an order from the tishonator.com site, you should receive an email from us with a download link. Open the email, click on the theme zip link and save the file on your computer:
Step 2. Log in your WordPress admin panel, from right menu navigate to Appearance -> Themes page
Step 3. Click on the ‘Add New’ button
Step 4. Click on the ‘Upload Theme’ button
Step 5. Click on the ‘Browse’ button
Step 6. Choose the theme zip file from your computer (which was downloaded from Step. 1)
Note: Sometimes, the theme zip file could exceed the maximum allowed size for the uploaded files, in that cases the following error will be displayed:
The uploaded file exceeds the upload_max_filesize directive in php.ini.
Instead of updating php.ini file (sometime you don’t have access to modify it), you can resolve the issue by:
1) Unzip the theme zip file, locally on your computer
2) Open the unzipped theme folder, navigate to YourThemeFolder/images/slider/ and DELETE all of the slider images files (i.e. 1.jpg, 2.jpg, 3.jpg, 4.jpg, and 5.jpg).
3) Zip the YourThemeFolder (after the files from step 2) are deleted) to a new file, i.e. YourThemeFolder.zip
4) Upload the YourThemeFolder.zip to your WordPress admin
Note: You will be able to re-set the slider images file (after activating your time) by navigating to Admin Panel -> Left Menu -> Appearance -> Customize -> Slider section.
Step 7. Click on ‘Install Now’ button
Step 8. Click on the ‘Activate’ link
That’s All, your new theme is now installed and ready to use


Comments
Post a Comment